Create opportunities from web contact forms
Adding a contact form to your website helps capture visitor information and automatically turn it into leads or opportunities, ensuring faster follow-up and better sales tracking.
Embedding a contact form on your website is an effective way to capture visitor details and convert them into potential customers. Once a user submits the form, their information can automatically generate a lead or opportunity in your CRM and be assigned to the appropriate sales team or representative.
Customize contact forms
By default, the Contact Us page includes a ready-to-use contact form. You can modify this form to match your business requirements.
To edit the form:
-
Go to Website app ‣ Contact Us
-
Click Edit to open the website builder
-
Select the form block to access its settings in the right sidebar
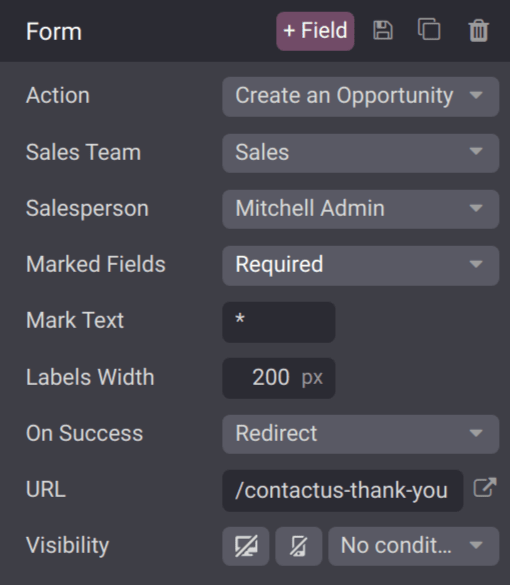
The following configuration options are available under the form settings:
-
Action: determines what happens after submission. By default, it sends an email. Change this to Create an Opportunity to capture data in the CRM.
-
Sales Team: select which team should receive the created opportunities. This option appears only when the action is set to create an opportunity.
-
Salesperson: assign submissions to a specific user. If left blank, assignment follows the team’s default rules.
-
Marked Fields: defines how required fields are handled. The recommended setting is to treat marked fields as mandatory.
-
Mark Text: choose the symbol used to indicate required fields (default is
*). -
Labels Width: adjust the width of field labels for layout control.
-
On Success: decide what happens after submission:
-
Nothing: stays on the same page with a confirmation message
-
Redirect: sends users to another page
-
Show Message: replaces the form with a custom success message
-
-
URL: specify the destination page if Redirect is selected.
-
Visibility: control when and where the form appears based on conditions.
Important
If Leads are enabled in CRM settings, selecting Create an Opportunity will generate a lead instead. To enable this feature, go to CRM app ‣ Configuration ‣ Settings, activate Leads, and save your changes.
Customize contact form fields
You can also configure each individual field within the form.
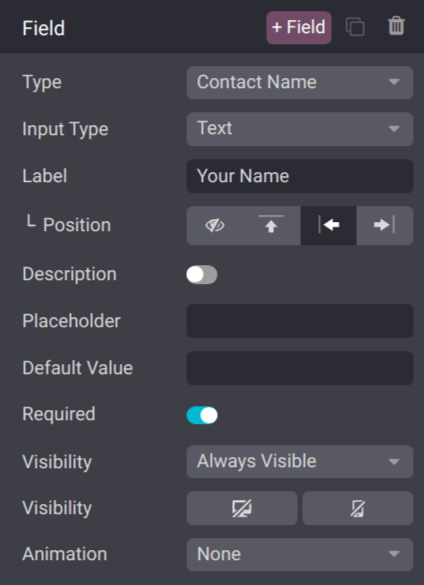
While in the editor, click on any field to open its settings panel. The following options are available:
-
Type: choose between predefined or custom field types
-
Input Type: define the expected format (Text, Email, Phone, URL), ensuring correct data entry
-
Label: set the field name displayed to users
-
Position: control how the label is aligned (above, left, hidden, etc.)
-
Description: add helper text below the field for additional guidance
-
Placeholder: display example input to guide users
-
Default Value: pre-fill a value if needed (not recommended for required fields)
-
Required: make the field mandatory for submission
-
Visibility: control whether the field appears on desktop, mobile, or both
-
Animation: optionally apply visual effects to the field
View opportunities
Once a visitor submits the form, a record is automatically created and assigned based on your form configuration.
To view these records:
- Go to CRM app ‣ Sales ‣ My Pipeline to see opportunities
Note
If the Leads feature is enabled, submissions will be stored as leads instead of opportunities. You can access them via CRM app ‣ Leads.
On the pipeline dashboard, click any card to open the record and view the submitted details.
Note
Because forms are customizable, the way data appears in the record may vary depending on the fields used.
For the default contact form:
-
The Subject field is stored as the opportunity Title
-
The message (often labeled Your Question) is saved under Internal Notes