Invoicing based on time and materials
Time and materials invoicing is used when project scope is uncertain or likely to change. This method allows billing for hours worked, materials used, and other project-related costs as they occur.
Invoicing based on time and materials is ideal when a project’s scope cannot be precisely estimated or may evolve over time.
Unlike a fixed-price contract, where the customer pays a predetermined total regardless of actual costs, time and materials invoicing allows flexibility to account for labor, purchases, travel, and other expenses.
The Odoo Sales app enables billing for hours worked, related expenses (like travel or lodging), and purchased items required to complete an order.
App and settings setup
To track project progress accurately, the Odoo Project and Accounting apps need to be installed.
To add the Project app, go to Odoo dashboard ‣ Apps, locate the Project block, and click Activate. The dashboard refreshes and the app becomes available.
Repeat the process to install the Accounting app.
Once installed, open Accounting, go to Configuration ‣ Settings, scroll to the Analytics section, and ensure Analytic Accounting is checked.

Click Save to apply the changes.
Next, go to Project app ‣ Configuration ‣ Settings, and in the Time Management section, enable Timesheets.
Click Save to confirm.

Configuring service products
With timesheets enabled, you can invoice for time spent, but only for products configured correctly.
Important: Only products with Product Type set to Service can be invoiced for time.
To configure a service product, go to Sales app ‣ Products ‣ Products, select or create a product. In the General Information tab:
-
Set Product Type to Service.
-
Set Invoicing Policy to Based on Timesheets.
-
In Create on Order, choose Project & Task to automatically generate a project and task when added to a sales order.

Note: Choosing Task instead of Project & Task allows adding the task to an existing project. The Project field appears when Task is selected.
Recording time on a sales order
With a configured service product, open Sales app ‣ New to create a quotation. Add a customer and the configured product under Order Lines, then click Confirm.
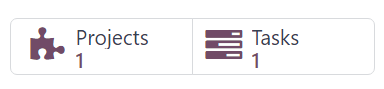
Two buttons appear: Projects and Tasks.
Click Tasks to open the task form. Under the Timesheets tab, employees can be assigned and record hours.
Click Add a line, select Date, Employee, and optionally add a Description. Enter hours worked in Hours Spent, which updates Allocated Time and the Hours Spent / Remaining Hours fields automatically.

Repeat for all employees and hours worked.
Invoicing time worked
Return to the sales order (via the Sales Order button or breadcrumbs). Hours recorded on tasks are shown in Order Lines and the Recorded Hours smart button.
To invoice, click Create Invoice, choose Regular Invoice, then Create Draft Invoice. The draft invoice shows work performed under Invoice Lines.
Tip: Review the Analytic Distribution column to ensure accurate time/material allocation.

Click Confirm to finalize the invoice.
Tracking expenses
Install the Expenses app via Odoo dashboard ‣ Apps, then activate it.
To add an expense, open Expenses, click New, fill in Description, Category, Total, Employee, Paid By, and link the expense to the sales order via Customer to Reinvoice and Analytic Distribution.

Attach receipts if needed, then click Create Report. Submit for approval, and the manager can approve and post journal entries.
Invoicing expenses
Navigate to the linked sales order and click the Sales Orders button from the expense report. The expense now appears in Order Lines and can be invoiced:

Click Create Invoice → Regular Invoice → Create Draft Invoice, review, and Confirm.

Purchasing for sales orders
Install the Purchase app via Odoo dashboard ‣ Apps, then activate it.
Create a purchase order under Purchase app ‣ New, add a Vendor, and under Products, enable Analytic Distribution via the extra column options.

Add products, ensure they are Can be Expensed, invoiced on Delivered quantities, and At cost under Re-Invoice Expenses:

Assign the correct Analytic Distribution:

Confirm the purchase, receive products, handle serial/lot numbers if needed, then create a vendor bill.

Invoice the purchase by navigating to the linked sales order. Purchased items appear in Order Lines:

Click Create Invoice → Regular Invoice → Create Draft Invoice, review, and confirm.

Finally, Register Payment to complete the invoicing.